

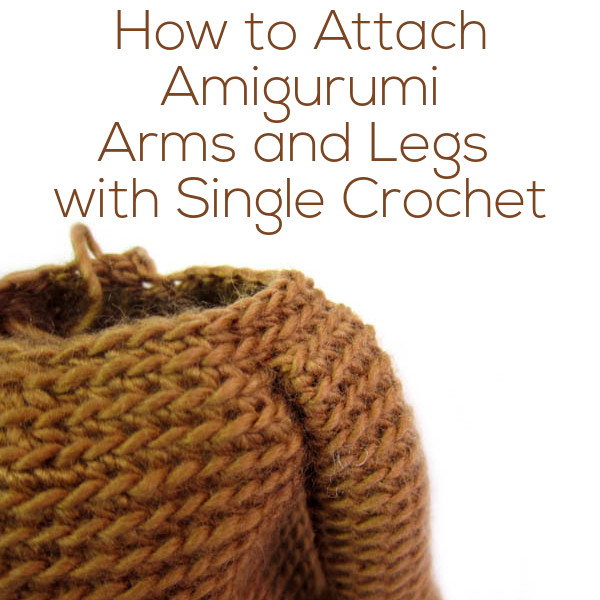
How To Add Arms To Amigurumi From The Bottom Up

Want to learn how to brand adorable crocheted stuffed animals with an easy online workshop – totally free?
Sign up for Let's Make Amigurumi here. You'll learn how to get started, the tools and supplies you'll need, and how to make an piece of cake amigurumi from start to stop using simple crochet stitches.
It's a fun, inexpensive, and totally portable craft. You tin do it!
When you crochet amigurumi, there are a couple of means to attach artillery and legs (and other parts).
Sometimes you attach amigurumi limbs after you've fabricated and stuffed all the parts using whipstitch and a tapestry needle. (There'south a tutorial here showing that method.)
This is necessary if the attachment runs across several rows of stitching, merely if the attachment is running WITH a row of stitching, yous can attach limbs while you crochet the body – all in one nifty step! Yous'll see this described in patterns as sc-attach, or single crochet adhere.
You can adhere arms and legs with crochet if:
- The trunk is crocheted bottom-upwardly (that is, starting at the bottom and ending at the summit)
- The arm or leg will be attached flat
For folks who don't like sewing, the chief reward to crocheting on the limbs is, well, yous're attaching the piece past crocheting. No need to pull out your tapestry needle!
The attachment is also quite secure, since it's built into the fabric of the softie. And it looks really squeamish!
At that place are disadvantages, though.
The main disadvantage is that it takes a little planning, since any parts need to be finished in order to attach them. Some other potential drawback is that if y'all don't like your positioning, you'll take to rip out rows of crochet to fix it.
How to Attach Artillery and Legs with Single Crochet
To commencement, work to where the arm needs to exist attached (as indicated by your design). Now, flatten the arm, and stick your crochet hook through both layers of the arm:
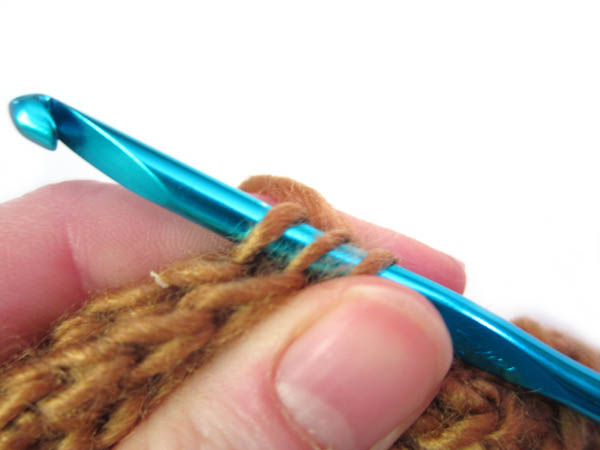
Notice that you have 3 loops on the hook: the starting loop, and then the 2 from the arm (one from each layer). Now, insert your hook into the next stitch on the body:
I know… it's a lot of loops!
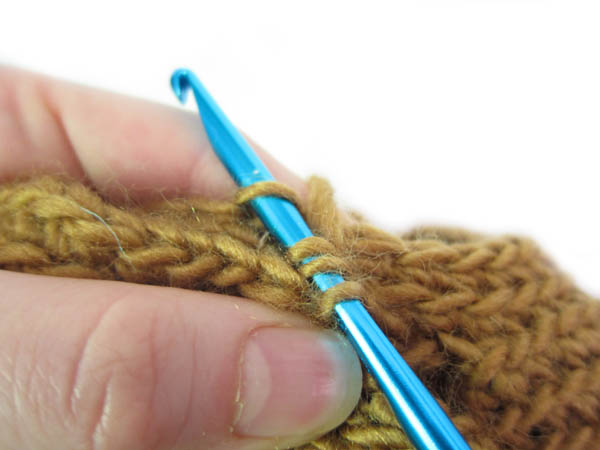
Now, to do your unmarried crochet, treat the 3 newest loops equally if they're 1. So, wrap your yarn around the hook, and pull through 3 loops. At present, wrap the yarn around the hook again, and pull through the remaining two!
That's one stitch! Continue (as instructed in the pattern) until the entire arm is fastened.
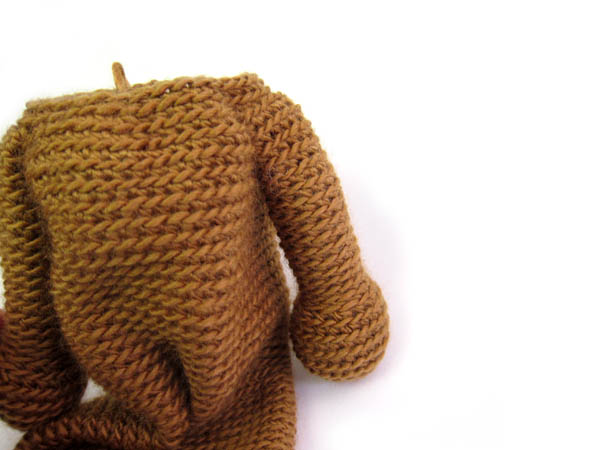
See? Await how peachy that looks!
Hither'southward a video to give yous an additional view of the procedure if y'all similar.
Run into how piece of cake that is? Go along and attach all your artillery and legs with unmarried crochet!
Happy stitching!

Crochet an adorably cuddly hound dog. Go the pattern here.

How To Add Arms To Amigurumi From The Bottom Up,
Source: https://www.shinyhappyworld.com/2018/01/attach-arms-legs-single-crochet-video-tutorial.html
Posted by: puckettsectirepas.blogspot.com
0 Response to "How To Add Arms To Amigurumi From The Bottom Up"
Post a Comment